How to carve smoothly
Votes:
There are few things better in life than learning how to carve on skis smoothly, and trust me, you’ll know when you’ve cracked it. You’ll feel eyes on you from the chairlift above, hear whispers on the wind, and enjoy that euphoric moment of “Oh my god, I can actually ski. I am simply never leaving this mountain.”
The problem is, it’s hard to know why carving doesn’t feel like that yet. Ski instructors say a lot of things, usually while shouting food items at you. “PIZZA!” “FRENCH FRIES!” Helpful… sometimes. But it doesn’t really explain how to connect turns and find that smooth, effortless flow.
This isn’t a ski instructor slander piece (at least not about the good ones). It’s about where carving actually falls apart for most skiers - in the transition between turns - and why that moment matters more than anything else.
In this article, you’ll learn five transition tips that will take your carving from forced and disconnected to smooth, rhythmic, and effortless. Whether you’re on blues, reds, or pushing into steeper terrain, a life of effortless carving awaits you at the end of this article.
Jens Nyström
Jens Nyström is a freestyle skier and founder of Stomp It Camps, where he works with skiers of all levels to move beyond comfort skiing and make real progress on snow.
Tip 1: Releasing pressure in the transition
There are a few key components to carving well. The first is speed. We’re not talking cartoon-style swooshes as you break the sound barrier, you simply need enough momentum for the ski to turn. It makes everything easier, even if that feels a bit counterintuitive when you’re trying to perfect your technique.
The second is seeing the carve all the way through, rather than bailing early and rushing into the next turn.
But the real magic comes from connecting the turns. Specifically, that moment where you release pressure and move into a cross-over transition. That’s where smooth carving either starts to happen… or falls apart.
That moment needs a bit of extra know-how and luckily for you, dear reader, it’s about to be explained.
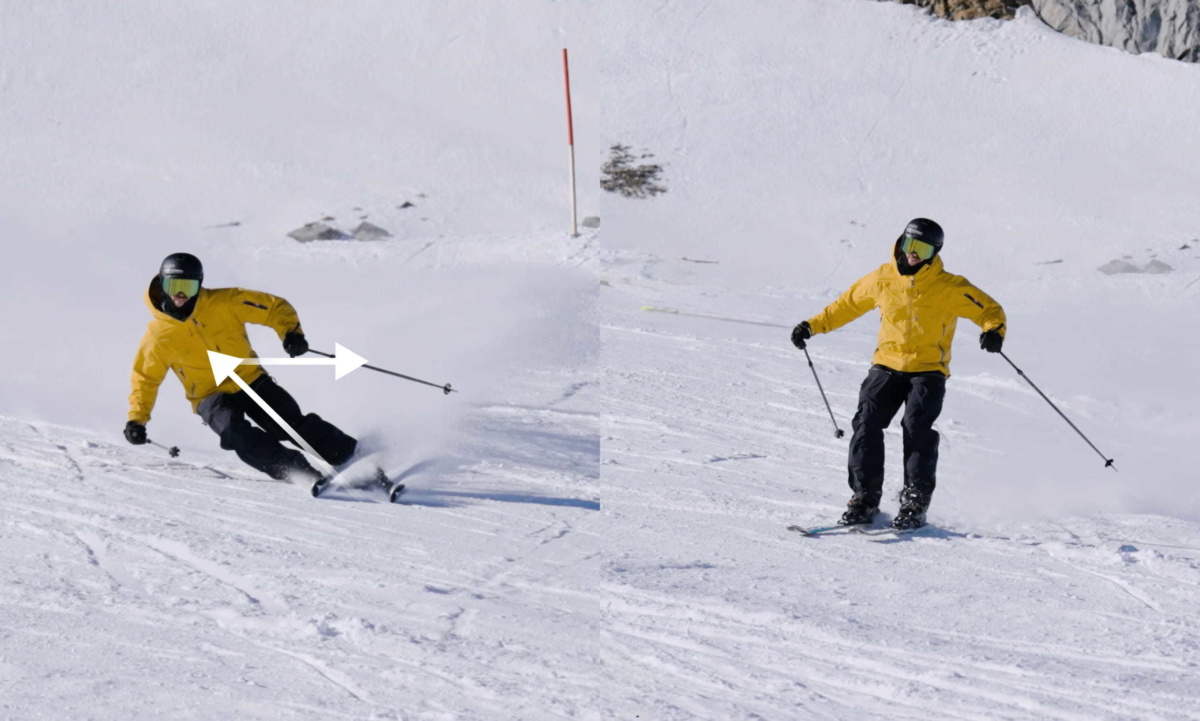
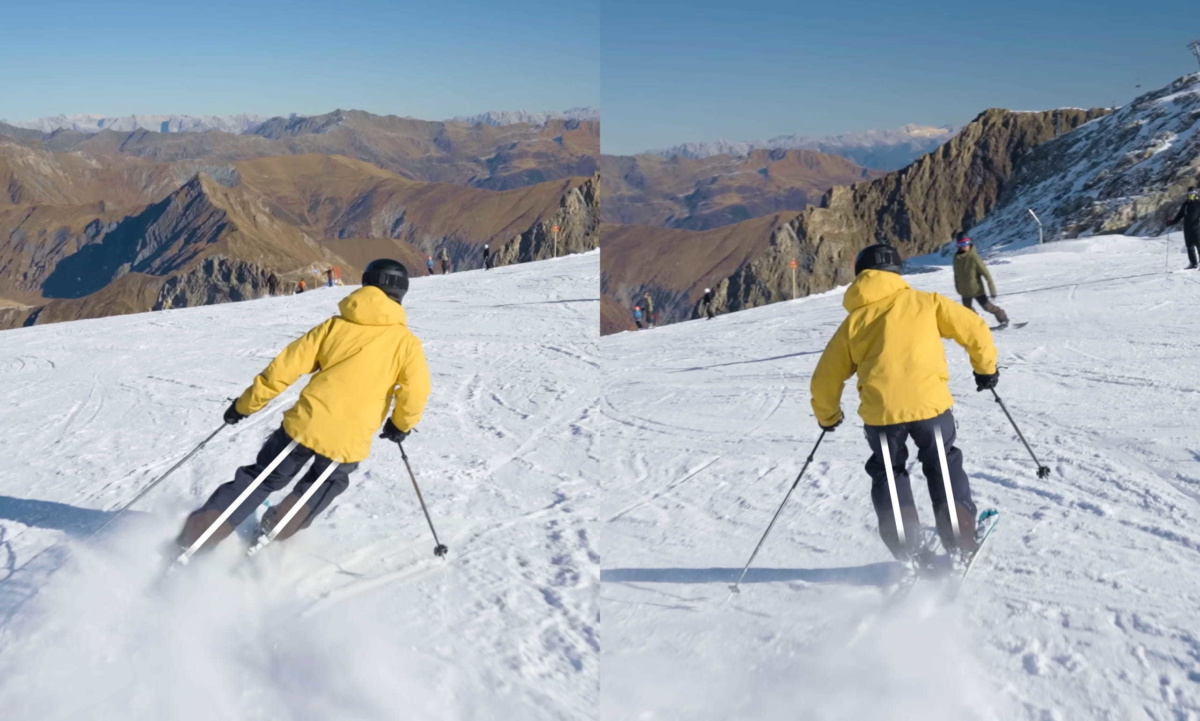
Think of the transition as a transfer of pressure from one foot to the next. During the bottom third of the turn - where you feel the maximum pressure - simply soften the outside leg a tiny bit and let the centripetal force pull you up into a nice, rather tall position.
This is what we call a cross-over transition, because the torso feels like it crosses over the skis. This is different from a cross-under, where the torso stays more or less in place while the skis move underneath you.
The goal here is simple: smoothly build pressure through the turn, then release it cleanly into the next one.
What does this actually mean, and how is it different from simply transferring pressure from the inside to the outside leg in a cross-over transition? Well, now we’re progressing. Don’t panic - you’re ready for this, I promise.
When you’re first learning to carve, everything is a bit bigger and more dramatic: big movements, big shapes, and taking up half the piste. That’s fine. It’s how you learn.
But once you’re feeling braver, it’s time to try a more modern cross-under transition. This is the technique you use when you need to carve quickly, cleanly, and in less space. In other words, the realistic kind of carving you rely on when the slope gets busy and - heaven forbid - there are other riders on the mountain (which, sadly, there usually are).
How to improve it
A cross-under transition does exactly what it says on the tin: the movement happens underneath you. You still need a bit of speed — imagine you’re on a red run, it’s getting busier, and the only thing between you and your first hot drink of the day is one tidy set of turns.
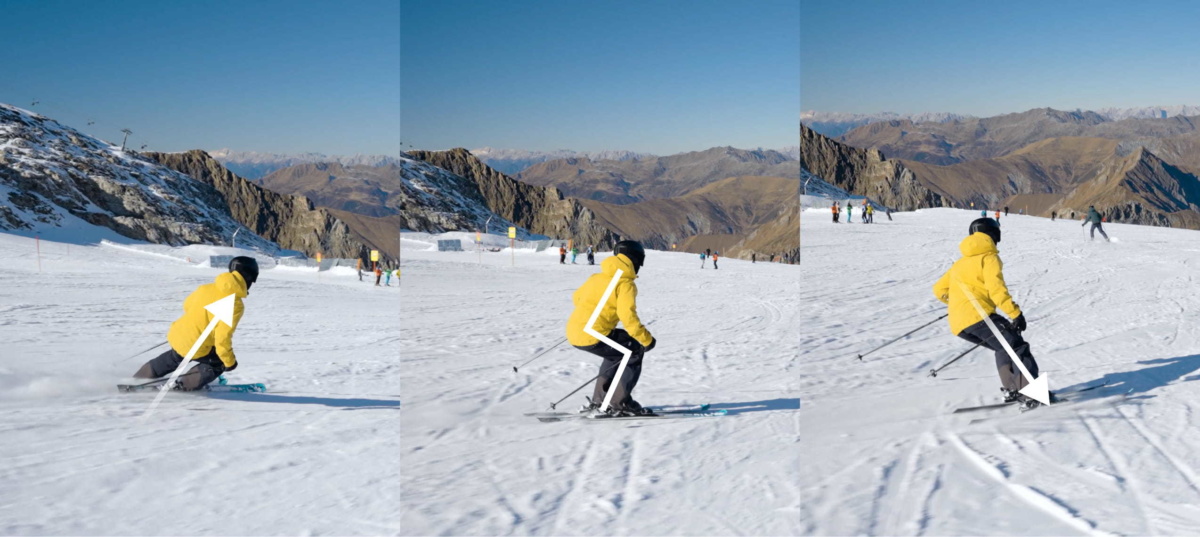
You’re in your carve position, with the inside leg shorter because both knees are bent into the turn. From here, release the pressure and let the weight shift until you reach a moment where both legs are equally short, with both knees bent. From there, the new outside leg takes the load, and the previous outside leg becomes the new inside leg.
In this exercise, the inside leg is always the short leg and the outside leg is the long leg - until they meet underneath you, become the same length, and swap roles.
The advantages of a cross-under transition are quick edge changes and easier access to early high edge angles, which help control speed when it gets steeper. The downside is that you’ll be slightly back-seated at the moment of transition. That’s fine — there’s almost no pressure on the skis here — but if you don’t find a strong, slightly forward posture by the top third of the turn, that back-seated position can start to cause problems.
How to know you’re doing it
Proprioceptive feedback
Proprioception is basically your body’s internal radar telling you where your limbs are and how they’re moving without you needing to stare at your skis. Those little receptors in your muscles and joints fire up the moment you start engaging your edges. It’s that feeling of “oh, I’m doing it, it’s working!”
During a cross-over transition, feel how the skis carve. Pay attention to how you smoothly release pressure through the bottom third of the turn, and how the centripetal forces naturally help pull you up into a strong, tall position before starting the next turn.
For a cross-under transition, feel how the head barely moves up at all. Notice how you rapidly and smoothly soften the long outside leg until both legs become equal. Once you’re familiar with that sensation, start paying attention to what happens after the transition: how you extend the new outside leg and how it brings the foot back underneath you into a strong position that’s no longer back-seated.
Video analysis
Amplify everything with video analysis. Have a friend film you, watch the recording back, and try to be as objective as possible. Step outside yourself and look at your skiing as if you’re watching someone else.
You’ll often spot things straight away - maybe you’re not moving enough, or your skis are losing grip and skidding more than you thought. You’ve got to be your own most constructive critic. A challenge with yourself is a good thing.
Use Carv
And better yet, use Carv. We’re obsessed, but for good reason. It’s a great way to know if you’re actually doing it right, and this isn’t limited to cross-over and cross-under carving.
Carv helps you check whether your overall technique is strong enough to produce the kind of skiing that has people on the chairlift staring down in awe and wonder.
Carv tip
Here are a couple of metrics to pay attention to:
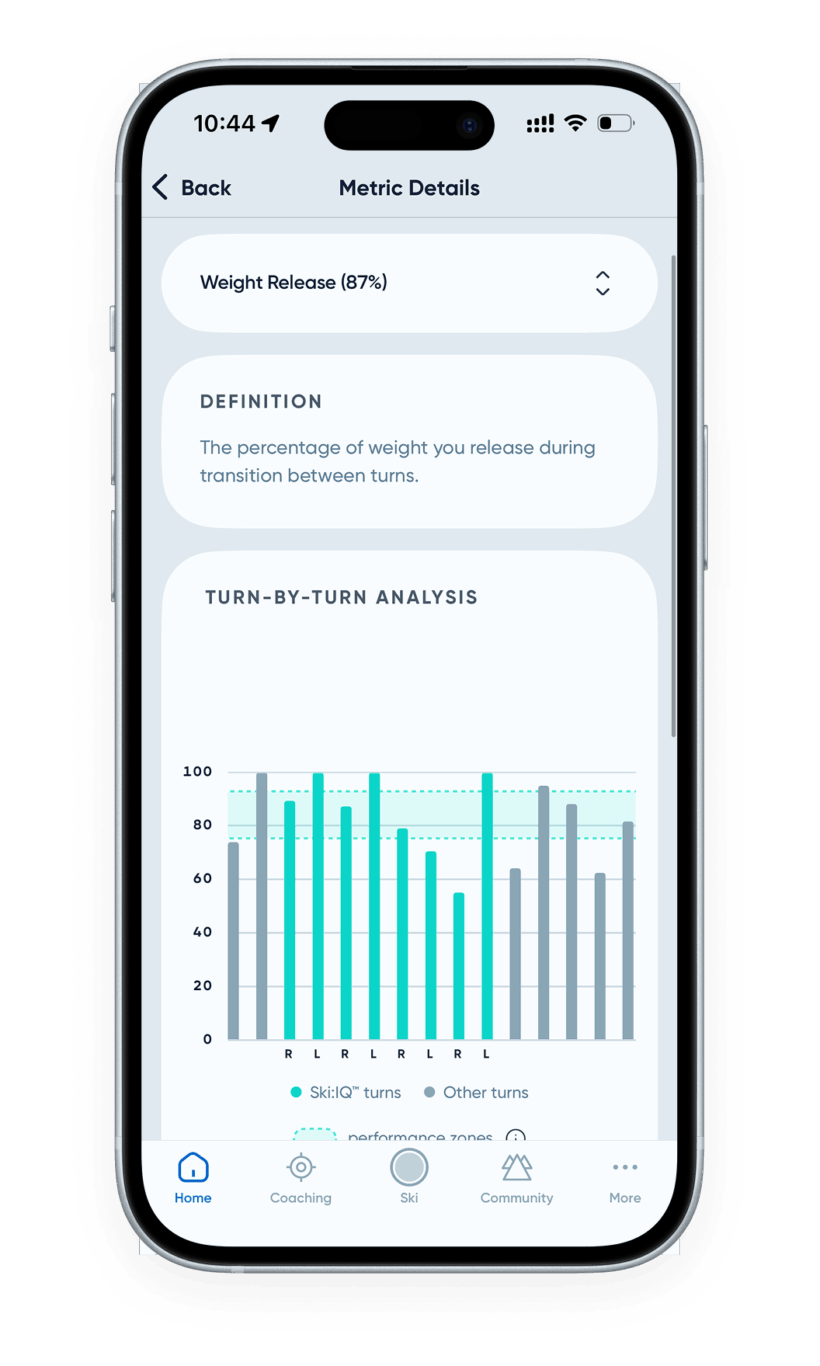
Carv directly measures how well you’re unweighting in the transition through the metric Weight Release.
A score close to 100% means your transition included a brief moment of being unweighted. By working on a quick, smooth release of pressure, you can track whether your transitions are improving over time.
Check out the ‘Smoothly linking turns’ skill in the Carving coaching pathway. If you ski with this skill training on, you’ll get instant feedback on where you’re going wrong and how to improve it.
Tip 3. Reduce your arc-length
We mentioned this earlier in the article, but it’s worth repeating: executing a smooth carve on skis, whether you’re using a cross-over or a cross-under, is actually harder when you’re going slowly.
When you’re learning and building confidence, it’s good practice to use the slope, take up space, and make large, rounded turns. But as your skills develop, you’ll want to increase edge angles and start shaving off some arc length.
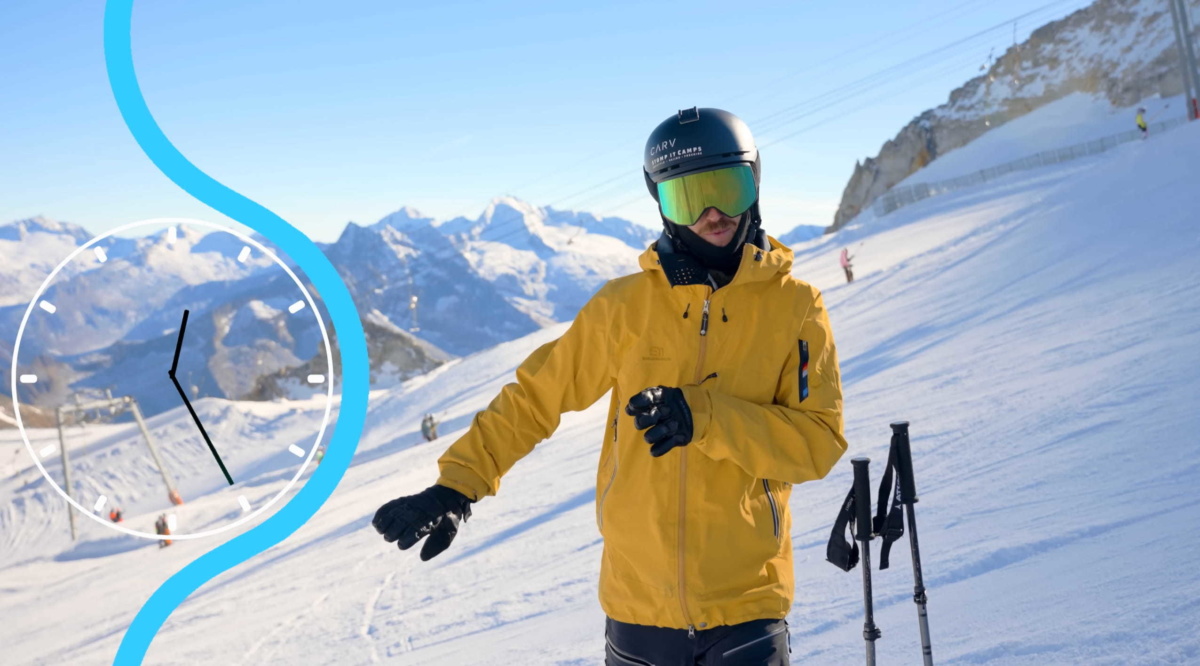
Imagine the start of your turn is at 12 o’clock and, by the time you’ve completed it, you’re at 6 o’clock. Now ask yourself: can you speed things up slightly and finish that arc at 5 o’clock instead? You’d be surprised how much trimming arc length can improve the smoothness and rhythm of your connected turns.
As a caveat, it’s hard for me to know whether you’re the kind of skier who finishes turns too early (around 2–4 o’clock) or drags them out too long (almost 12–6). Experiment with different arc lengths and find your own sweet spot.
How to improve
Find a nice open stretch of slope and pick up a bit of speed. Start by closing the turn from 12-6 o’clock. Then, slowly and steadily over multiple turns, shorten the arc length until you reach a point where you can still build high pressure on the outside ski and release it smoothly into the next turn.
Tip 4: Stop pole dragging!
Do you remember when you first went skiing and the instructors confiscated your poles? That’s usually because they don’t want you using them incorrectly or relying on them too much.
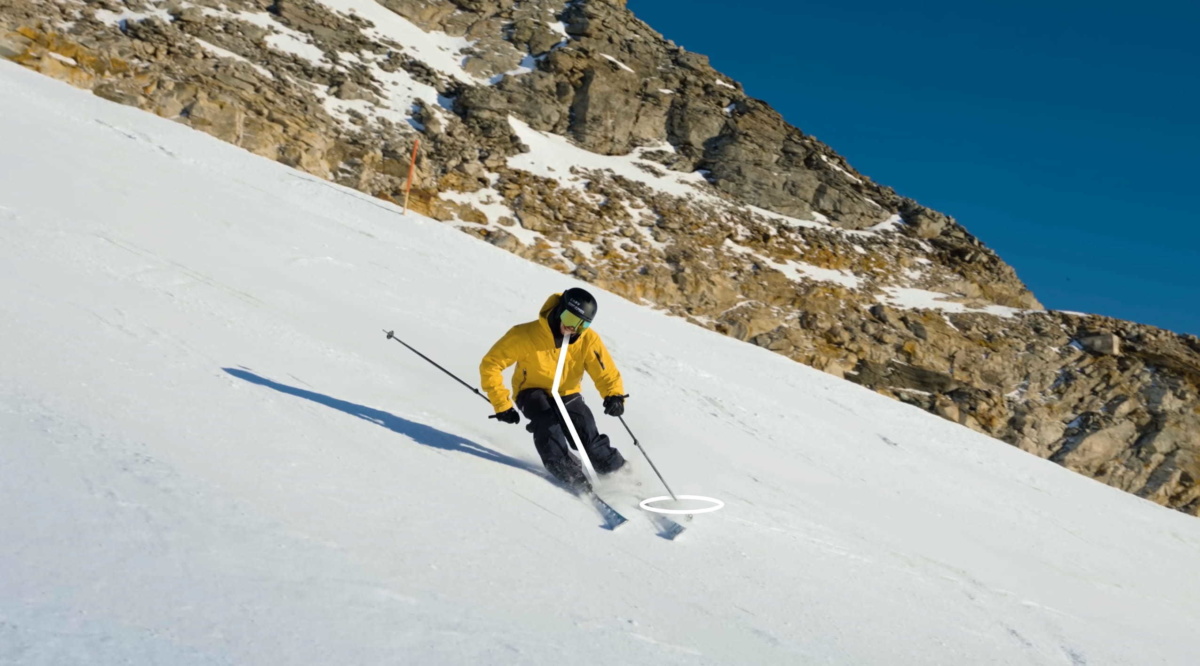
But when it comes to learning how to carve on skis smoothly, this is actually the perfect time to bring the poles back in and use them to help you execute the turn. As you ski through the bottom third of the turn, gently drag your pole to remind yourself to angulate (keep your zipper upright) and place more pressure on the outside leg.
How to improve:
Your pole does far more than stop you from falling over. It adds rhythm to your turns and helps you find a consistent flow, making each turn the same size as the last.
Imagine looking back up the slope and seeing a clean line of sharp, tidy carve tracks, all matching perfectly. Just make sure you don’t pole plant like you would in short or tight turns. For carving, it should be a gentle drag on the outside, not a plant.
Tip 5. Airborne edge change
Now we’re talking. This is expert-level skiing. The airborne edge change is the apex of ski moves. It’s sexy, it’s technical, and it feels unbelievably cool.
First things first: try this on skis with a shorter radius - something with a smaller turning circle. And make life easy for yourself by practising in the morning, when the runs are freshly groomed.
How to improve:
As you release pressure through the bottom third of the turn, soften the outside leg quickly so you hover into the next turn. A proper jump might happen if you’ve built enough speed and pressure, but the goal isn’t to jump, it’s to float into the next carve.
End
That’s all from me. Go practise your transitions, enjoy the looks from the chairlift, and don’t forget that effortless carving is one of life’s great pleasures.
Level Up Your Skiing with Carv at Stomp It Camps
At Stomp It Camps, we use Carv as a key training tool to help you take your skiing to the next level in the stunning Swiss Alps. Every turn, drill, and run is recorded to get data-driven insights that accelerate your progress.

Written by: Stomp It Tutorials
Ski technique and freestyle camps
Stomp It Tutorials lead in-person technique camps in Zermatt and Laax, Switzerland, where they combine Carv's objective analysis with in-person coaching to push your skiing technique to the next level.