Proper Ski Stance & Posture (An Illustrative Guide)

Votes:
What is the proper ski posture?
A proper ski stance and posture stems from what I’d call the ‘athletic stance’. To me this stance is quite universal with most sports. When you walk up and ask someone to get into an athletic stance the results are similar, no matter who you ask.
An athletic stance involves a wide stance, with the ankle, knees and hip slightly bent. The arms move out to the side and slightly forward.

The stance is common across many sports because it allows balanced, fast reactions in multiple directions. That balanced position is essential to stay in the driving seat over your skis.

Believe it or not, the same needs to take place in skiing.
Here is the exact routine that I do every time I start sliding down the hill.
I do this mental checklist on every slope at the top, to help me get into my athletic stance before I ski.
- Hip hinge, keep the core tight ('bow to the snow gods')
- Make contact with the tongue of the boot (bend your ankle inside your boot)
- Feel your balance just in front of your heel (bend the knee to maintain your connection to your heel
My mantra puts me in a great body position every time - and it's very repeatable.

Wherever I am with my clients, I refer to this position by use phrases like "your upper limit" or "as tall as you should ever get" to refer to that skiing posture. When you're out skiing on your own, think back to that idea.
Why? It helps to stop you from getting 'too tall' (i.e. the stand up and talk position we naturally use).
What happens if I get 'taller'?
Your joints straighten and you fall out of balance - often resulting in leaning too far back (skiing in 'the back seat'). This is certainly not the right posture when you are facing a challenging slope ahead of you.
My athletic stance allows me to move and adapt to various speeds and/or any turn shape that will best suit the terrain and snow conditions.
I need to keep this athletic stance so that I can bend and move in order to manage the forces that act upon me (gravity, ground reaction force, centrifugal force…) depending on the situation that presents itself.
These forces fluctuate frequently and act upon us as we turn on a variety of slopes, so we need to do our best to manage them while we are skiing down the mountain.

Three of the most important forces to manage whilst skiing.
Managing your posture in practice
As a ski instructor I look at your athletic stance by seeing where your Base of Support (BOS) is in relation to the Centre of Mass (COM). I want to know if you, the skier, will be able to deal with the range of forces you will generate as you turn.
In the picture below you can see an example of the hip hinge I was referring to - look at the wrinkle it creates in my jacket.
With my clients I tend to call it a mouth and it needs to keep smiling as you are skiing.

Managing stance throughout your turn
As we move, we create different angles which will add some variables to our stance. The two main ones are:
Base of Support (BOS)
Your feet placement can change depending on the ski environment you are in (Powder/Bumps = narrower, On piste = Hip width)
Centre of Mass (COM)
Generally, the COM lies around the area of the abdomen, but since we bend and have our arms away from our centre in order to help create a balanced athletic stance, it moves to just outside of the body.
With Carv this is being measured by the foot sensors and shows up in your balance and pressure scores.

Carv Tip: Fixing your balance
Carv measures your balance and pressure constantly as you ski. You'll find out if you're in the right position and what you need to do to fix it.
We've designed ski drills specifically to help you stay centered over your skis so you can lock in your balance and start working on those turns.

Common issue: Knee caving
I tend to see this skiing posture issue often when I am teaching people, no matter what their skiing ability level is.
The knees fold/rotate inwards as you turn creating a weak platform for skiing.
This issue tends to result from to a muscular weakness or a dysfunction that is inhibiting the muscles and joints from behaving properly.
One way you can test yourself at home is to set up your phone and video yourself or you can ask a family member or a friend to watch you while you do this test. Try to do this with your eyes closed as it will help you keep yourself honest with the results (but don't fall over!)
- Clear a space so that you will not bump into anything, then do a small hop forwards (about ½ a metre distance) and stick the landing
- Look to see how your knees line-up over your feet.
- When you are doing this try your best not to move upon landing (do not stand up, try to stay in that absorbed position).
- You may also want to try doing the hops to the right and left as well as a backwards hop.
If your knees collapse inwards, then you likely have a weakness in the gluteus muscle group and/or your abductor muscles.
What is happening that your adductors as are pulling your body inwards for that stability (see image below).

Your adductors control balance and alignment of your legs, moving your hips and thighs inwards towards your midline.
When the knees turn in this creates a very weak body position (a weak skiing stance) that will not be able to manage those skiing forces- resulting in loss of control, weak turns and a big barrier to the amount of fun you're going to be having on the slope.
Most likely your body will have to make other moves:
- such as standing taller in hopes of gaining structural stability or
- possibly a twisting of the upper body at the finish or to start or your turns as an attempt to get the body in a more stable position.
Fixing it - the Banded Crab Walk
Find an appropriate strength mini band, place the band just above your knees and get yourself into a squatted position.
With your knees at shoulder width apart (moving towards the right) you are going to step out with your right foot, about 30cm (12 inches) then step the left foot.
- Try not to have your knees move closer than shoulder width apart which will help keep the band under tension.

If done correctly you will likely feel a burn in your butt (specifically your gluteus medius).
This exercise works in two ways…
- it will help strengthen your Gluteus muscles and
- it will also encourage the law of reciprocal inhibition (when one muscle is on then the opposing muscle is off). In this particular case it will help engage your abductor muscle group and let your adductors lengthen and relax.
With repeated practice of this exercise you will notice your knees staying more in line when you repeat the hops in the initial test.
Good luck!
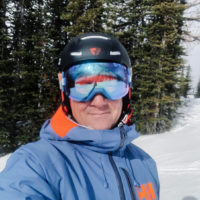
Written by: Morgan Engel
CSIA Level 4 Instructor
A bit about me: I have been instructing/teaching and coaching the sport of skiing for 28 years in a wide range of capacities, from head coach of a racing club to instructor training, but always as a ski instructor to the public. My certifications are CSIA Level 4 and a Level 3 course conductor, ACA Development level race coach and a Canfitpro certified personal trainer. I currently sit on the CSIA National Board as the Alberta Representative, as well as on the CSIA regional board of Alberta.


