How To Carve on Skis
Votes:
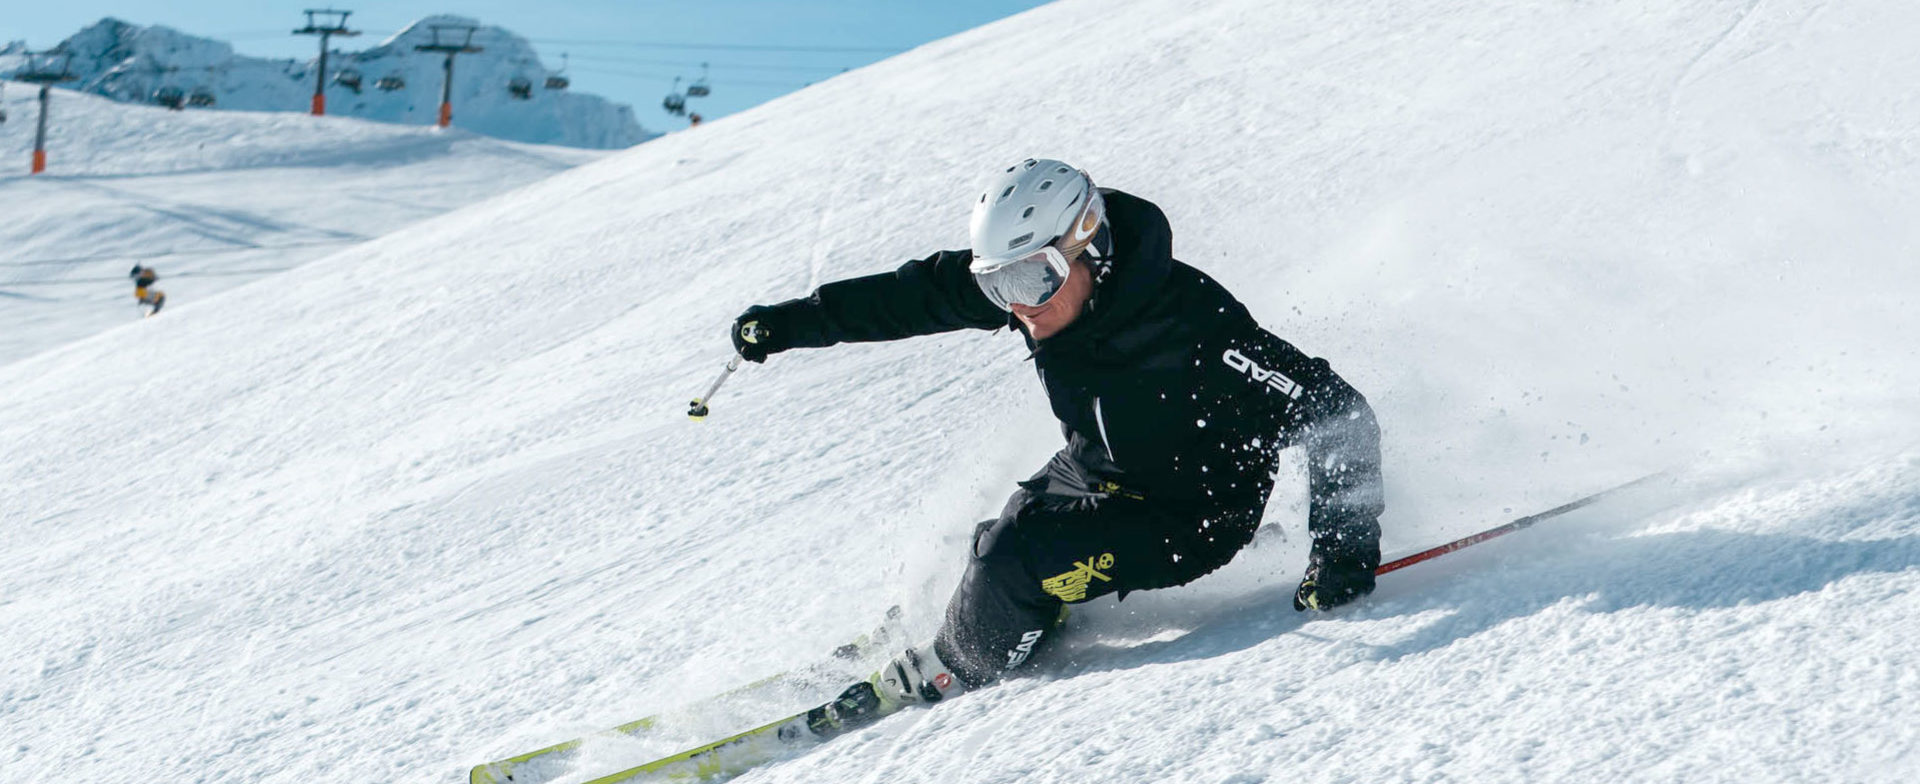
Carving has become synonymous with great skiing; it’s how world cup racers ski, and it creates some of the most memorable and exciting moments as you are skiing.
Carving is a huge goal for most intermediate skiers, and it’s a skill that most advanced skiers think they already have! But seeing a skier truly pushing their equipment to the limit of its capabilities is pretty rare; so here’s a guide to take you from comfortable parallel skier to a confident carver.
What is carving?
A carved turn is where the ski is bent against its natural camber into an arc, and that arc shape guides the skis along a curved path. Modern skis are already shaped to make this easier. When carving, the tail of the ski follows the same path of the tip; meaning almost no resistance from the snow, and leaves a clean pencil line track in the surface of the piste. A carving ski will move faster and build more pressure, so you feel higher g-forces than in any other turn, which is why it’s the best technique for racing. It is also why it feels so good!
How does it work?
When you tip a parabolic shaped ski on its edge, the tip and tail stay on the ground, but the middle underfoot will rise up slightly. If you balance in the middle of that ski your weight will press it into the snow, bending the ski and putting it on an arced path. The more you tip the ski, the further the foot has to go to dig into the snow, so the more the ski bends. This is why great skiers lie almost all the way over to make tight radius carved turns.
What is the goal?
I mentioned most skiers think they can carve. That usually involves going very fast and tipping the body slightly from side to side without careful consideration of their pressure and motion. This is fun but it doesn’t really achieve much! You only deviate slightly from straight down.
Gravity gives you momentum down the hill. You are trying to take that momentum and make it take you across the hill (or from gate to gate in a race course).
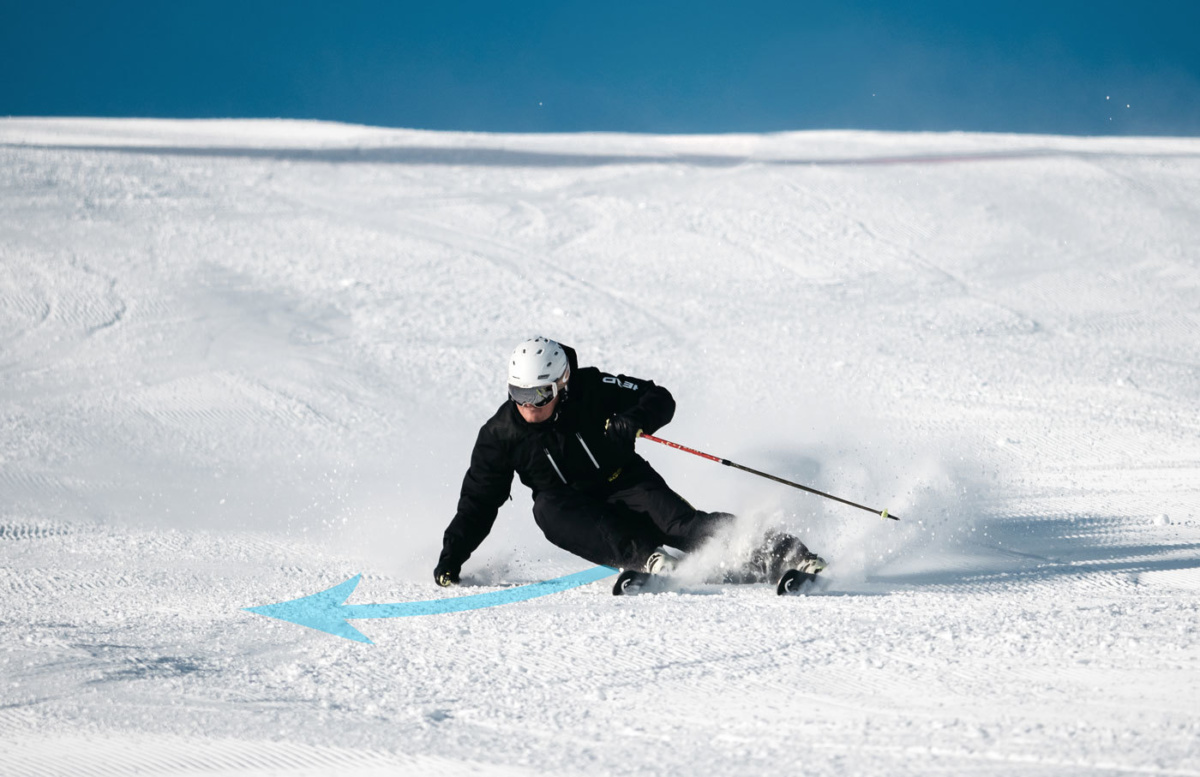
Great edge engagement and pressure control moves you across the hill.
How to carve in 4 steps
Very few turns are purely carved from start to finish, but most good turns involve a carved phase. The easiest and most useful time to carve is the final third of the turn; as the skis are steered out of the fall line and back across the hill. This is where most of the direction change and speed control is achieved. Start by carving the very end of your turns and, when you can control speed and balance well, bring it further up in the arc.
1. Tip them over and balance on the outside
That’s all there is to it. Sounds simple? It is in theory; in practice a lot of things have to go right for this to happen effectively.
- Stand still on a reasonably steep hill, with the skis across the fall line.
- Try to side step up the hill without the skis sliding down.
- Did you have to tip the downhill ski into the hill to get the edge to bite and give you a platform to stand on?
- Did you have to bring your balance over the downhill foot to be able to step the other one up the hill?
That position right before you step the uphill foot off the snow has everything you need to make a ski carve: the skis are edged and you are balanced on the outside.
- Try traversing in this position with a bit of speed and aim to get the edge to bend and bite rather than slide.
- Do the skis want to steer up the hill?
- Link some turns together aiming to steer into this position and feel the pressure and edging you create.
Play around with this on different slopes, and get comfortable doing it at speed. Do you notice the steeper the hill the quicker the skis want to drive up the hill out of the traverse? Traversing on a steeper pitch means a higher edge angle; so the ski bends more when you balance over the middle and tightens the radius of the turn.
If you have any trouble with this, try dragging the outside pole tip in the snow, or reaching down the hill to touch your outside knee or boot to move your center of mass more over the outside ski.

Initiate your carve from earlier in the turn and concentrate on building a platform against the outside ski.
2. Work it up the turn; make angles
To tip the skis on edge the lower legs need to tip to the inside. To balance on the outside foot, the centre of mass needs to move the other way. So to edge effectively we need to make angles in the body, as you do when preparing to step up the hill.
Take the carved feeling from the traverse and put it in higher up the arc, so you are carving for a larger portion of the turn. You’re working towards feeling that you are standing on that solid platform on the outside foot from the fall line all the way to completion. Start with the same position, but understand you will need to tweak it while moving, because the forces change as you progress through the turn. Learn to adjust the feet to stay in the middle of the outside foot and keep the ski running cleanly through the snow.
In the video below, Level 4 instructor Tomas Mical gives us a step by step approach to create a carving platform with the outside ski.
Balance against your outside ski to create a stable platform for your turn.
3. Carving into the fall line
Carving the first half of the turn will pick up a lot of speed. To work on this, head to a wide easy green run where you can straight line with no worries.
- Spaghetti Legs: Start on a straight run with the skis flat. Tip both skis onto the little toe edge, they should diverge. Now tip both onto the big toe edge, they should come back in and meet in the middle. The skis should run smoothly in both directions; don’t push them across the snow, keep the tails following the tips. To do this successfully and keep moving in a straight line means keeping the upper body and hips stable; the edging movement comes from the feet and legs, so the ankles and knees tip, not the hips and shoulders.
- Rollerblades/Edge Rolls/Train tracks: Back in a straight run. Keeping the same upper body discipline you got from spaghetti legs, tip the skis over the same way; one foot to the little toe edge and one ski to the big toe. You are trying to carve shallow serpentine turns leaving clean knife edge lines in the snow. If you keep the hips and shoulders steady, the skis should steer across the body and your balance will gradually shift to the outside foot.
- Wide stance: As well as needing stability at these speeds, a wide stance gives you the space to roll the skis on edge.
- Get low: The legs don’t move laterally when they’re straight, meaning the edging move will now come from the hips and shoulders - moving the mass towards the inside ski. You need a lot of bend in the ankles and knees to unlock your lateral range of motion.
4. Putting it together
Make some bigger more complete turns now, trying to bring this move into the start. You are looking to edge the skis and establish balance on the outside ski earlier in the turn now.
- This is harder when moving across the fall line rather than down it. It takes a lot of discipline not to move the upper body in and end up on the inside ski, and you movements become much more subtle and well-timed to flow from one set of edges to the next.
- Allow the outside leg to lengthen as you move into the fall line; you are looking to move into that ‘ready-to-step-up-the-hill’ position you worked on. Linking carved turns requires you to transition smoothly between these movement patterns.
- If you make the ‘Rollerblade Turn’ move early enough you won’t have a lot of pressure to deal with as you are just going with gravity, and if you make it smoothly enough there will be a period when the skis are not so aggressively edged and you can still steer them by turning the legs. This allows you to tighten the radius and avoid picking up too much speed, while still finding early edge and balance.
Develop your carving with a few quick practical tips from Olympian race skier Kaylin Richardson
6 common carving mistakes
There are mistakes we’ve all made learning how to edge and grip effectively. Learn to spot the symptoms and you can begin to solve problems while you move.
1. Diverging skis: Do your skis move apart like a fork in the road when you’re in the fall line? Or does the outside ski slide down as you bring them across at the end of the turn?
You are balanced on the inside ski; without weight on the middle of the ski it will not bend, so the outside ski simply tracks forward when you point it down the hill. And at the end of the turn your weight isn’t holding it in the snow, so it won’t grip, it will skid.
The Solution: Try unweighting the inside ski, while you move your head over the outside foot.

Diverging skis: the inside ski is carrying the skier while the outside ski is running down the hill and starting to skid
2. The Crutch/ A-framing: the outside ski is aggressively edged, yet you don’t seem to be turning much? Usually the inside leg is still hanging straight down beneath you to support you, giving the dreaded A-frame. If you move the hips inside to edge the skis, before you’ve got a platform to stand on, they will not support you. Your brain knows this so it leaves the inside leg there as a crutch just in case you lose the outside ski.
The Solution: As you edge the skis at the start of the turn, feel the ground pushing back into your outside ski before you tip them any further. Establishing a solid platform to stand on allows you to move your body inside and maintain grip. If you use Carv, check out your edge similarity metric to see how consistently you are edging each ski. You can ski with it as a live audio feed if you want to get rid of your A-frame.

An A-frame is formed as the outside leg is expecting to be pressurised but the inside knee is resolutely carrying much of the weight
3. Losing the Tails: at the end of the turn, right when you need grip, many people lose it on the tail of the outside ski, resulting in a downstem skid and recovery, rather than a smooth completion and transition - ruining their perfect railroad tracks in the snow. This can happen because a skier is too focussed on 'getting forward'.
The Solution: If this happens you need to slightly shift your balance towards the heels. Try pulling back the inside foot and if necessary push the outside foot forward to move your weight backwards relative to the outside ski. Keep the heel grounded and keep the tail of the ski gripping as you enter the transition.

The downhill tail is slipped out at the end of the turn reducing the ability to smoothly transition into the next turn.
4. Chatter: Sometimes, on the hardest of icy days, there just isn’t enough grip to be found, and you go for a slide and take what you can get. Most of the time however, it is possible to make a ski glide cleanly through a turn without chattering in and out of the snow. Pay attention to where it is chattering. Is it the tips? You need more pressure on the front of the ski; pull the feet back underneath you. Is it chattering under the foot?
The Solution: Balance, don’t brace. You need to find a balance between being strong enough to resist pressure, and loose enough to allow the ski to work. Falling down the hill and letting the skis catch you, feeling like a sack of spuds over the outside ski, will result in a far smoother turn than pushing and forcing the edge into the snow looking for grip.
5. Moving too fast: Do you make a big move to start the turn and then feel like you are waiting to land on the outside ski before anything else can happen? Do you turn the skis a lot and then feel them bounce in and out of the snow when you try to engage the edges to make them carve?
The Solution: Slow your movements; it’s a big turn, you have all the time you need. If you make a 3-point-turn in a car you turn the steering wheel very quickly, but if you are doing 100kmph on the motorway you slow any steering movement right down!
6. Finishing on the tails: At the end of a turn are the skis running away from you, resulting in a big traverse? Do the skis take an eternity to find the fall line when you start the next turn? The most aggressive sidecut on your ski is between the tip and the toe-piece of the binding, meaning you have to engage the front of the ski to initiate a turn with any control.
The Solution: Pull the feet back underneath the body in the transition; bend the ankle and feel the shin on the front of the boot, it should put you back in the driving seat.

Finishing on the tails can propel the skier across the slope without enough control to smoothly enter the next turn
There’s no better feeling than carving up a groomer on your way around the resort. Many skiers think they can carve, but very few do so with the grace and control that really turns heads! Make sure you focus on these tips and dedicate your attention to carving to get the most from this skill, as once you get it, it’ll really keep you coming back for more!
Learn to carve with Carv
The Carv app is perfectly designed to accelerate your carving progress.
- Try out Carving Training, created with Olympic racer Kaylin Richardson, and PSIA elite coach Eric Lipton. Move through 20 levels of carving assessment with increasing difficulty to really improve your technique.
- Challenge yourself to turn with some serious angulation using the Edge Angle Challenge.
- Or dial in on your edge angle turn-by-turn using the Edge Angle Monitor, which gives you a read-out of your edge angle on every turn.


Now get out there and rip up the piste!


